Overview
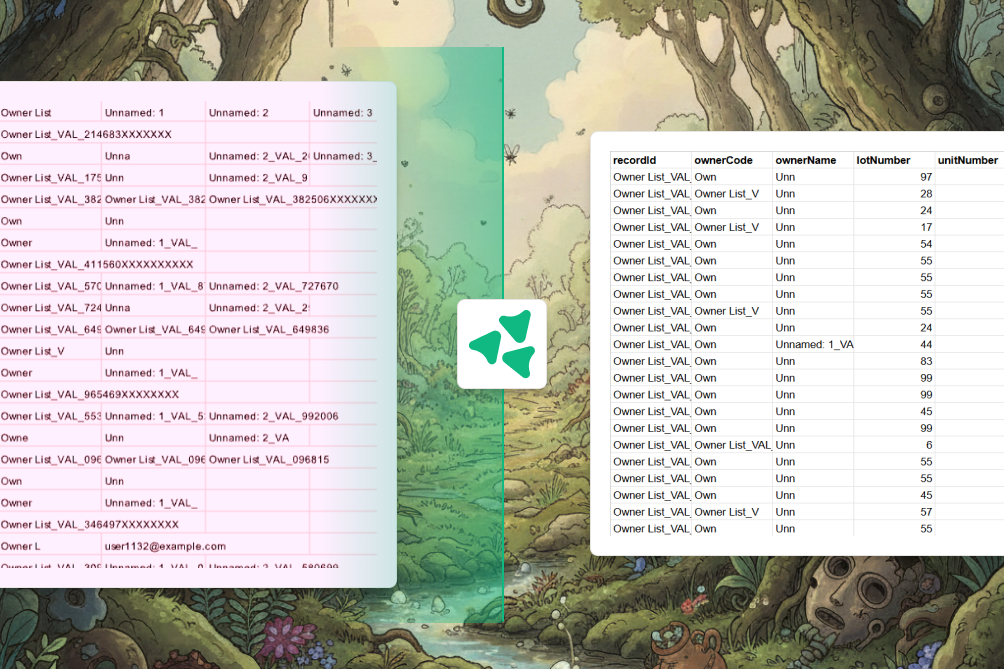
When your Excel file doesn’t have a proper header row (or you don’t want to use the first row as headers), Vern uses advanced parsing to detect table structure. You then map those columns to your sheet, optionally resolve duplicates and row matching, clean data in Chat, and export. The main steps are:- Upload the Excel file and choose not to use the first row as headers
- Map source columns to your template columns
- Handle duplicate rows and row matching (if applicable)
- Clean and transform data using Chat
- Export the sheet as CSV
Step 1: Upload Excel and turn off “Use first row as header”
- Open the workbook and select the sheet you want to import into.
- Click Import (or the upload action) and choose your Excel file.
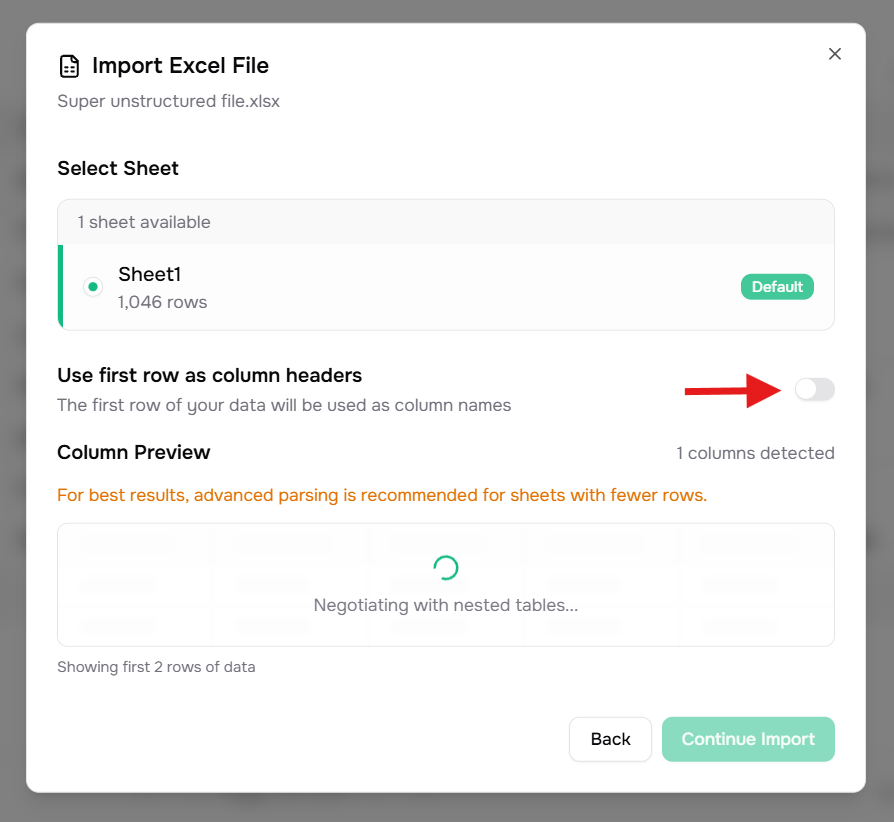
- In the Import Excel File dialog:
- Select Sheet – Pick the sheet to import (e.g. “Sheet1”). The list shows row counts per sheet.
- Use first row as column headers – Turn this off (toggle to the left) so the first row is treated as data and Vern infers structure.
- With the toggle off, Vern runs advanced parsing and shows a Column Preview with detected columns and sample rows. For large sheets (e.g. 200+ rows), a note may suggest using advanced parsing on smaller sheets for best results.
- Click Continue Import.
Step 2: Map columns
In the Map Columns step:- Source columns (from your Excel) are listed; you map each to a target template column or mark it as ignored.
- Vern can suggest mappings (you may see “Analyzing your data to suggest optimal mappings” briefly). You can accept, change, or clear suggestions.
- Use the search box to find columns. Adjust mappings by clicking a source and choosing the correct target column.
- The preview table shows how the first rows will look with the current mappings. Map as many columns as you need; unmapped sources can be ignored.
- When ready, continue to the next step (e.g. Continue or the next button).
Step 3: Duplicates and row matching (if shown)
Depending on your data and sheet:- Remove Duplicate Rows – If there are duplicate values in a key column, you’ll choose which column should be unique and, for each duplicate group, which row to keep. Resolve these and proceed.
- Match Rows to Existing Data – If the sheet already has data, you’ll see how imported rows match existing rows (update) or add as new. Select the matching identifier column and resolve any conflicts (e.g. which incoming row maps to which existing row).
Step 4: Clean data with Chat
After import, your data is in the sheet. Use Chat to clean and transform it:- Open Chat in the workbook.
- Use natural language and the
@symbol to reference columns (e.g.Fix the format of @Phone NumberorStandardize @Email addresses). - Send your instructions; the AI will apply changes to the sheet.
Step 5: Export as CSV
When the data is ready:- In the workbook header, open the sheet menu (the ⋯ or “More” control for the current sheet).
- Click Export CSV.
- The file downloads (e.g.
workbook-name-sheet-name-YYYY-MM-DD.csv) with all rows and template column headers. If export is in progress, the control may show “Exporting…” until the download finishes.
Tips
- Unstructured Excel – Turning off “Use first row as column headers” is best when the first row is not a real header (e.g. titles, merged cells, or mixed content). Vern then infers columns from the rest of the data.
- Column mapping – Map at least the columns you need for validation and downstream use. Ignored columns are not imported.
- Cleaning – Combine Chat with your template (descriptions and validation) so the AI can suggest and apply cleaning more accurately.
Next steps
- How to write effective prompts – Clean and transform data with natural language
- Workbooks – Concepts and features
- Chat – Bulk transformations in workbooks
- Partially update a workbook with another file – Merge data from another file by matching rows